A couple months ago I mentioned that I start binding at the corners and never have to join the two binding ends along the side. The few times I attached binding the traditional way I ended up with a little bulge where I joined the binding on the side, yuk. If you use the method in this tutorial, you'll never have to join the binding ends, and you'll have beautifully mitered corners.
A few words before I begin:I took a class from
Sharon Pederson about 3 months after I started quilting, and she mentioned this binding method in passing. It's in both of her books (
Reversible Quilts and
More Reversible Quilts), but she said she didn't develop the method -- someone showed her. I tried it and love it, and I really like the way the corners look. But a year ago I took a class from
Sally Collins, who is extremely precise, and asked her about this method -- she had never tried it, but didn't think the results would be as good as the traditional method of applying binding. Her bindings are beautiful indeed, but mine never looked that good.
Ok, here goes! Are you ready?
For this explanation, I'm assuming you'll be using a 2-1/2" strip folded in half to make a 1-1/4" double-folded binding. Seam allowances are 1/4".
Be sure to use thread that matches the binding! This is important as you might see a bit of thread where the miter is stitched in, especially if you are overly zealous when turning out the corners.
1. Stitch binding onto one side. Leaving about a 3" tail at the beginning, stitch the binding down one side. Always reinforce the beginning and end of each row by backstitching or doing a knot stitch if your machine has one.
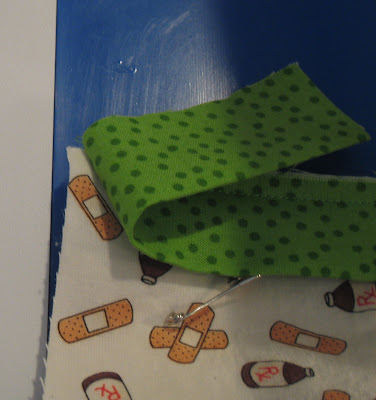
Start stitching 1/4" inch from the top edge (I folded the tail back so you could see this in the photo). I measure this, because the corners look best when they meet exactly.
When you get near the end of the first side, use your ruler to find 1/4" from the end and put a dot on the binding so you will stop exactly there. (If for some reason you are using a 3/8" seam, then start and stop 3/8" from the edge.) I adjust the stitch length for the last few stitches if I need to so I stop right on the dot. Reinforce the end with backstitching or a knot stitch, then remove the quilt from the machine and cut the binding, leaving a short tail at this end also.
 2. Stitch a triangle to make the corner miter. You are going to join the binding that you attached to the first side to the binding for the next side by stitching them together at the corners. You'll stitch a little triangle that when opened up will form a mitered corner.
 a)
a) Using your ruler, draw a line across the binding from the folded edge to the very end of the seam line. The line should be exactly 1/4" from the bottom edge of the quilt. If you started with a 2-1/2" strip folded in half to measure 1-1/4", then your line (which stops at the seam) should measure exactly 1". Put a dot exactly in the middle of the line, at 1/2" from either edge. If your binding is a little off, just note the measurement that you have and put a dot exactly in the middle of that. (And if you used binding of a different width, adjust your measurements -- a 2" binding folded to 1" with a 1/4" seam gives you a line that is 3/4" long, so your dot in the center would be at 3/8" from either end.)
b) Use your ruler to mark a dot exactly 1/2" beyond the dot in the middle of your baseline. (If your measurements are different, adjust that distance accordingly -- if your baseline dot is 3/8" in from either side, then make this dot 3/8" above the line.) Use your ruler to connect the new dot to each edge of the baseline. You'll have drawn a triangle like the one in the photo above. Be sure the triangle points out, not back towards the quilt!
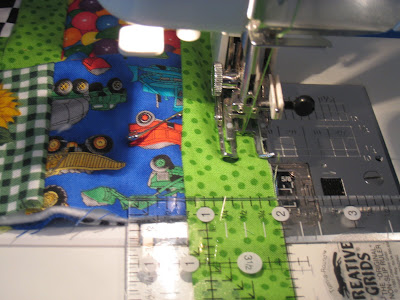
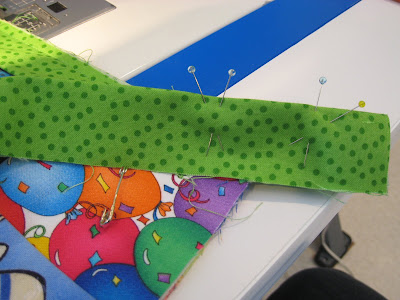
3. Pin and stitch the binding for the next side to the binding you just stitched on. This step is the only fiddly part of doing the binding, and it's not hard because you use pins to keep everything from slipping. Lift up the end of the stitched-down binding and place the folded edge of the new binding, exactly even with folded edge of the first binding. The triangle will be on top and the new binding underneath the binding you already stitched on. Pin the binding on both sides of the triangle -- be sure to keep the folded edges exactly even. I use two pins, each at a different angle, on each side to be sure things don't slip. It sounds tricky, but if you pin, it's not. I pin far enough from the triangle that I don't need to worry about removing the pins while I stitch.
Now it's time to stitch in the triangle, which will join the two pieces of binding. (I neglected to take a photo of this in the machine, so here is a photo of stitching the last side to the first -- the only difference is that your second piece of binding won't be stitched to the quilt like the one in the next photo is.)

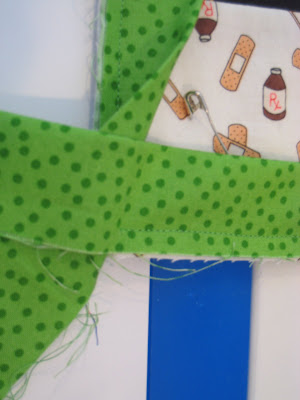
Start at the side of the triangle by the seam, and put your needle down exactly where the line hits the seam. Use a small stitch and sew to the top of the triangle, then turn and sew to the baseline at the folded edge. Reinforce the beginning and the end by a knot stitch or backstitch. In the photo below, you can see the triangle stitched in (for purposes of teaching, it's too bad the thread is the same color, but put on your reading glasses and look closely, you can see the stitches). See how nice and flat the bindings lie along the sides!
 4) Stitch the second piece of binding down.
 Start exactly at the corner where the seam ended on the first side, always reinforcing the beginning and end points.

In the photo above you can see how the corners look on the back -- each side exactly meets up with the other. So pretty! Now continue in exactly this way until you have stitched the binding to all four sides and made triangles on 3 corners.
5) Stitch in the last corner. This is done exactly like the first three, except that both sides of the binding are stitched down. This actually makes it a tiny bit easier! Yay! The hard work is over.
 6) Trim the seams and turn the corners.
 You don't want lots of bulk in the corners, so trim the seams around the little triangles. They'll look like this.

Turn the corners right side out, using a pointy chopstick to push out the end of the corner. You have a stitched in miter! Here's the front ...

...and here's the back.
 7) Handstitch the binding down in the back.
 It's so wonderful not to worry about the corners when you're stitching -- they're done! No fiddly folding. Here's the back...
...and here's the front after the handstitching. Mission accomplished! And no joining the binding on the side!

If you have any questions, please let me know and I will edit the post to make it clearer if need be. Happy quilting!

 And I saw this ad in the most recent issue of Cooking Light. I wanted to find this image on the web, but couldn't, so I have to use the washed out photo I took of it. I love cityscapes anyway, and was enchanted by the thought of using a black fabric with spattered dots to show a skyline with lights in the buildings.
 And while I was looking at the picture, I noticed the writing was upside down. So I turned it over.
 Now the lights in the buildings are out, but you can see the stars in the sky. Absolutely wonderful! This is an ad for Earth Hour, which is sponsored by the World Wildlife Fund to publicize the effects of climate change. They are asking everyone to turn off their lights for an hour at 8:30 pm local time on March 28. Please check out their website for more information and to find out how you can participate. Such an incredible ad!
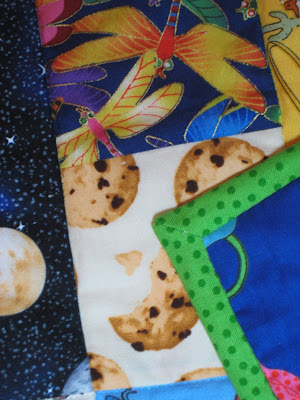
 And finally, here's an I Spy I delivered to a friend's son this evening. So much fun!


